-
nuscene camera 이미지 그리기openxlab 2024. 7. 17. 21:57
nuscene은 6개의 카메라 이미지가 저장되어 있다.
한번에 그려보고 데이터 구조가 어떻게 되어 있는지 파악해보자!
이미지이므로 로직도 같이 실행해본다. 백본 resnet50을 사용하는 R-CNN 이다.
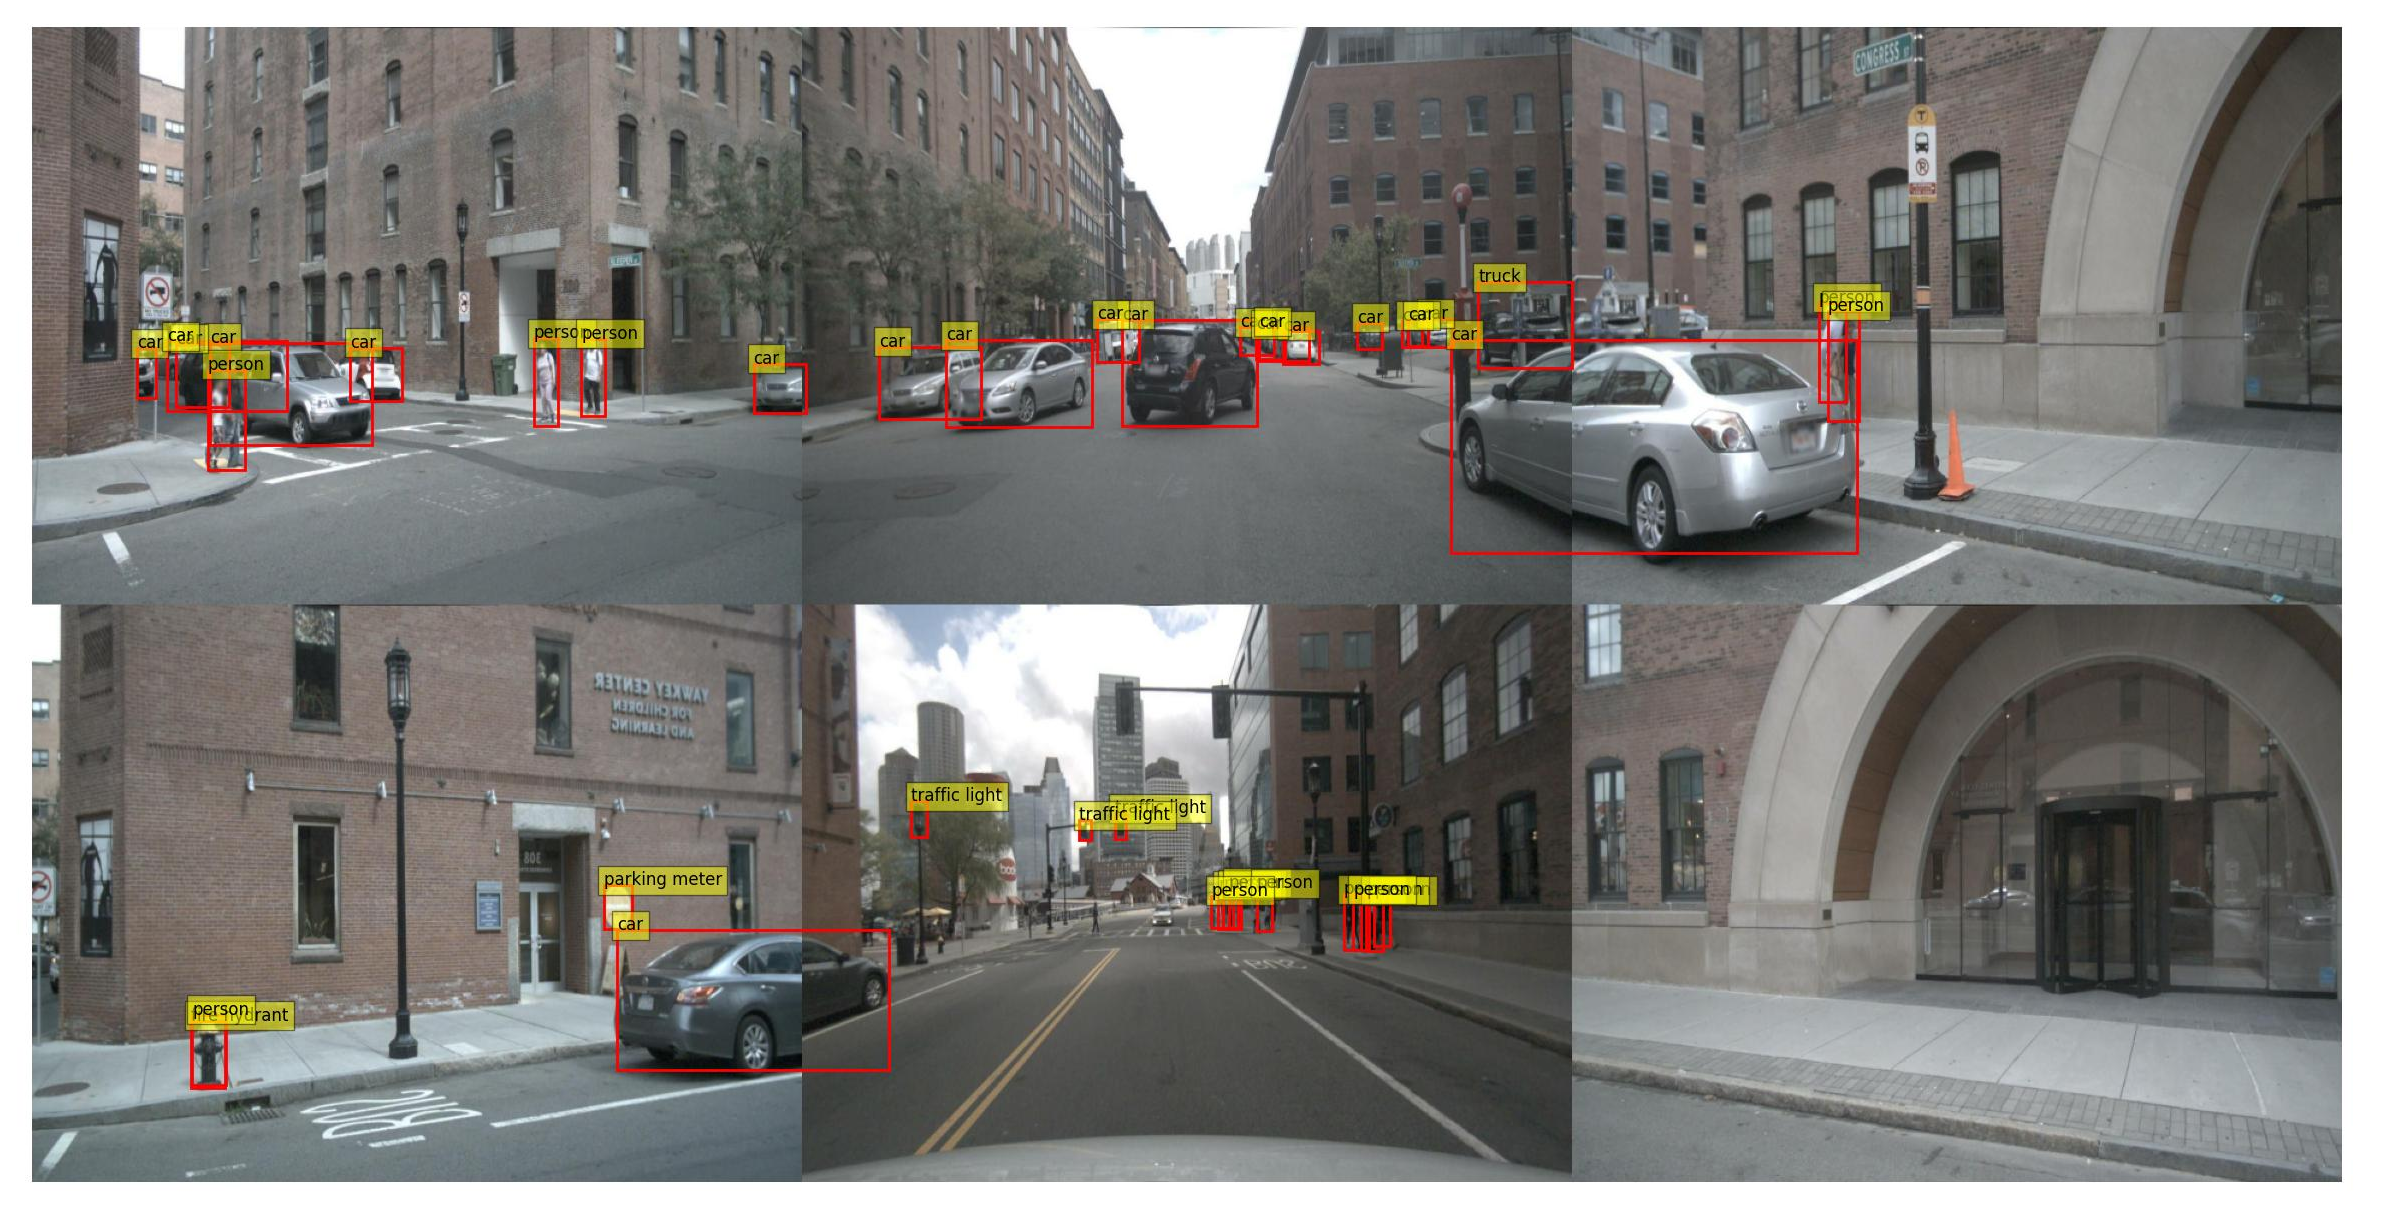
# 사전 학습된 Faster R-CNN 모델 로드
model = fasterrcnn_resnet50_fpn(pretrained=True)
model.eval()
아래 그림과 같이 잘 실행되는것을 확인 할 수 있다.
각 scene을 이미지로 출력해보고 이미지를 저장한 다음 동영상을 만들어 보자!.
이미지를 로직에 넣기 위해서는 tensor로 변경해야한다.
그래서 아래와 같은 변환을 한다.
#PIL 파입 변환
#numpy배열 형태의 이미지를 PIL (Python Imaging Library) 형태로 변환
img_pil = Image.fromarray(image)

#tensor로 변환 후 unsqueeze(0)를 통해서 차원을 1개 늘림.
image_tensor = transform(image).unsqueeze(0)
즉 이미지 입력은 (1, C, H, W) 이 구조인 것이다.
그리고 intrinsic cal 이나 extrinsic cal은 진행하지 않았다. 사실 어떻게 하는지 모름.ㅡㅡ...
import os
import cv2
import numpy as np
import matplotlib.pyplot as plt
import torch
from torchvision.models.detection import fasterrcnn_resnet50_fpn
from torchvision import transforms
from PIL import Image
from nuscenes.nuscenes import NuScenes
# NuScenes 데이터셋 경로
nusc_data_dir = '/data/sets/nuscenes/samples/'

# 각 카메라 폴더
camera_folders = ['CAM_FRONT_LEFT','CAM_FRONT', 'CAM_FRONT_RIGHT', 'CAM_BACK_LEFT','CAM_BACK', 'CAM_BACK_RIGHT']

target_classes = [0,1,2,3,4,6,7,8,9,10,11,12,13,14,15,16,17]

coco_classes = [
    "__background__", "person", "bicycle", "car", "motorcycle", "airplane", "bus", "train", "truck", "boat",
    "traffic light", "fire hydrant", "stop sign", "parking meter", "bench", "bird", "cat", "dog", "horse", "sheep",
    "cow", "elephant", "bear", "zebra", "giraffe", "backpack", "umbrella", "handbag", "tie", "suitcase", "frisbee",
    "skis", "snowboard", "sports ball", "kite", "baseball bat", "baseball glove", "skateboard", "surfboard",
    "tennis racket", "bottle", "wine glass", "cup", "fork", "knife", "spoon", "bowl", "banana", "apple", "sandwich",
    "orange", "broccoli", "carrot", "hot dog", "pizza", "donut", "cake", "chair", "couch", "potted plant", "bed",
    "dining table", "toilet", "TV", "laptop", "mouse", "remote", "keyboard", "cell phone", "microwave", "oven",
    "toaster", "sink", "refrigerator", "book", "clock", "vase", "scissors", "teddy bear", "hair drier", "toothbrush"
]

def merge_images(sample_record):
    radar_tokens = {
        'front_left': sample_record['data']['CAM_FRONT_LEFT'],
        'front': sample_record['data']['CAM_FRONT'],
        'front_right': sample_record['data']['CAM_FRONT_RIGHT'],
        'back_left': sample_record['data']['CAM_BACK_LEFT'],
        'back': sample_record['data']['CAM_BACK'],
        'back_right': sample_record['data']['CAM_BACK_RIGHT']
    }

    images = []
    for key, img_token in radar_tokens.items():
        img_sensor = nusc.get('sample_data', img_token)
        img = cv2.imread(os.path.join(os.path.join(nusc.dataroot, img_sensor['filename'])))
        if img is not None:
            img = cv2.resize(img, resize_dim)  # 이미지 리사이징
            # CAM_BACK 카메라만 좌우 반전
            if 'back' in key:
                img = cv2.flip(img, 1)

            if img is not None:
                images.append(img)
            else:
                print(f"Error reading image from {img_sensor['filename']}")

    combined_row1 = np.hstack(images[:3])
    combined_row2 = np.hstack(images[3:])
    combined_image = np.vstack([combined_row1, combined_row2])
    image = cv2.cvtColor(combined_image, cv2.COLOR_BGR2RGB)

    return image

def detect_objects(model,transform,image):
    image_tensor = transform(image).unsqueeze(0)
    with torch.no_grad():
        predictions = model(image_tensor)
    return predictions[0]

def visualize_predictions(image, predictions,target_classes, score_threshold=0.5):
    plt.cla()
    plt.imshow(image)
    plt.axis('off')

    for box, label, score in zip(predictions['boxes'], predictions['labels'], predictions['scores']):
        if score > score_threshold and label in target_classes:
            x1, y1, x2, y2 = box
            plt.gca().add_patch(plt.Rectangle((x1, y1), x2-x1, y2-y1, edgecolor='red', facecolor='none', linewidth=2))

           # 라벨 숫자 그리기
            plt.text(x1, y1, f'{coco_classes[label]}', fontsize=12, bbox=dict(facecolor='yellow', alpha=0.5))


    plt.pause(1)  # Pause to update the plot


def extract_number(filename, name ):
    try:
        number_str = filename.split(f'{name}')[1].split('.')[0]
        return int(number_str)
    except IndexError:
        return None  # "__CAM_BACK__" 뒤에 숫자가 없는 경우 처리

def make_mf4(scene_type):
    # 동영상 작성
    video_filename = os.path.join(output_dir, f'combined_image_{scene_type}.mp4')
    files = os.listdir(output_dir)
    file_list = []
    for file in files:
        if file.endswith('.jpg'):
            file_list.append(file)
    # 파일 이름에서 숫자를 추출하여 정렬하기
    frame_files = sorted(file_list, key=lambda x: extract_number(x,'combined_image_') or float('inf'))

    # 첫 번째 프레임에서 프레임 크기 가져오기
    frame = cv2.imread(os.path.join(output_dir,frame_files[-1]))
    height, width, layers = frame.shape

    # 동영상 작성자 초기화
    video = cv2.VideoWriter(video_filename, cv2.VideoWriter_fourcc(*'mp4v'), 10, (width, height))

    # 각 프레임을 동영상 작성자에 추가
    idx = 0
    for frame_file in frame_files:
        frame_path = os.path.join(output_dir, frame_file)
        frame = cv2.imread(frame_path)
        if frame is None:
            print(f"프레임을 읽을 수 없습니다: {frame_path}")
            continue
        idx += 1
        print(f"프레임 {idx}: {frame_path}")
        resized_frame = cv2.resize(frame, (width, height))
        video.write(resized_frame)

    # 동영상 작성 종료
    video.release()

plt.figure(figsize=(30, 15))
# 이미지 리사이즈 크기 (옵션)
resize_dim = (640, 480)  # 원하는 크기로 설정

# 결과 저장 디렉토리
output_dir = './combined_images'
if not os.path.exists(output_dir):
    os.makedirs(output_dir)

# 사전 학습된 Faster R-CNN 모델 로드
model = fasterrcnn_resnet50_fpn(pretrained=True)
model.eval()

# 이미지 전처리
transform = transforms.Compose([transforms.ToTensor()])

# Initialize
nusc = NuScenes(version='v1.0-mini', dataroot='/data/sets/nuscenes', verbose=True)

scene_type = 'total'

i = 0
for j in range(len(nusc.scene)):

    scene = nusc.scene[j]  # Adjust the scene index as needed
    current_sample_token = scene['first_sample_token']

    enable_write_avi = True

    while current_sample_token:

        sample_record = nusc.get('sample', current_sample_token)
        # 이미지 합성
        image = merge_images(sample_record)

        # 타겟 검출
        img_pil = Image.fromarray(image)
        predictions = detect_objects(model,transform,img_pil)

        print(f"Predictions for combined image:")
        visualize_predictions(image, predictions,target_classes)

        # 이미지 저장
        output_path = os.path.join(output_dir, f"combined_image_{i}.jpg")
        plt.savefig(output_path)  # PNG 형식으로 저장

        current_sample = nusc.get('sample', current_sample_token)
        current_sample_token = current_sample['next']  # Move to the next sample
        i = i + 1
        print(i)

if enable_write_avi:
    make_mf4(scene_type)
동영상으로 만들어 봤다.
생각보다 classification이 잘되는 것 같음.
반응형'openxlab' 카테고리의 다른 글
nuscene의 데이터 구조 설명 (2) 2024.07.17 nuscene 이미지 저장 초기버전(draft) (0) 2024.07.17 nuScene radar points 그리기 (0) 2024.07.17 mmdetection3d - CRN - 3 추가 (0) 2024.07.17 mmdetection3d - CRN 실행 - 2 (3) 2024.07.16